I recently became obsessed with Smash books. I watched videos on Youtube of all the different hand-made creations and I decided that I wanted to make one. Since my daughter asked for David Wright stuff for Christmas I decided to make a David Wright Smash Book.
I am thrilled, and so is she, at how this turned out, but I didn't think it would take so long to make. This project has to be one of the most detailed, and time consuming projects I have taken on. This post is very pic heavy.
I made this book 7.75 x 10.25 with the inside pages measuring 7.25 x 9.75. I saw one of the K&Company Smash Books at Michaels and I liked the size so I made my book the same size.
This is the front cover. I covered the front and back covers with silver metallic paper over chipboard, and the pictures of him on the front and back covers are from a calender I bought.

This is the inside front cover and first page. I broke the book into 3 sections, and Wright This Way is the beginning of the 1st section.

Close up of the 1st page.

Pages 2 & 3...

Close up of page 2.
I made a pocket on this page and printed the wording, If you're not WRIGHT you're WRONG on vellum which I attached to the pocket with my Xyron.

Close up of page 3.
I created this page in Excel, and the photo was taken by my daughter at a Mets game.

Pages 4 & 5.

Close up of page 4.
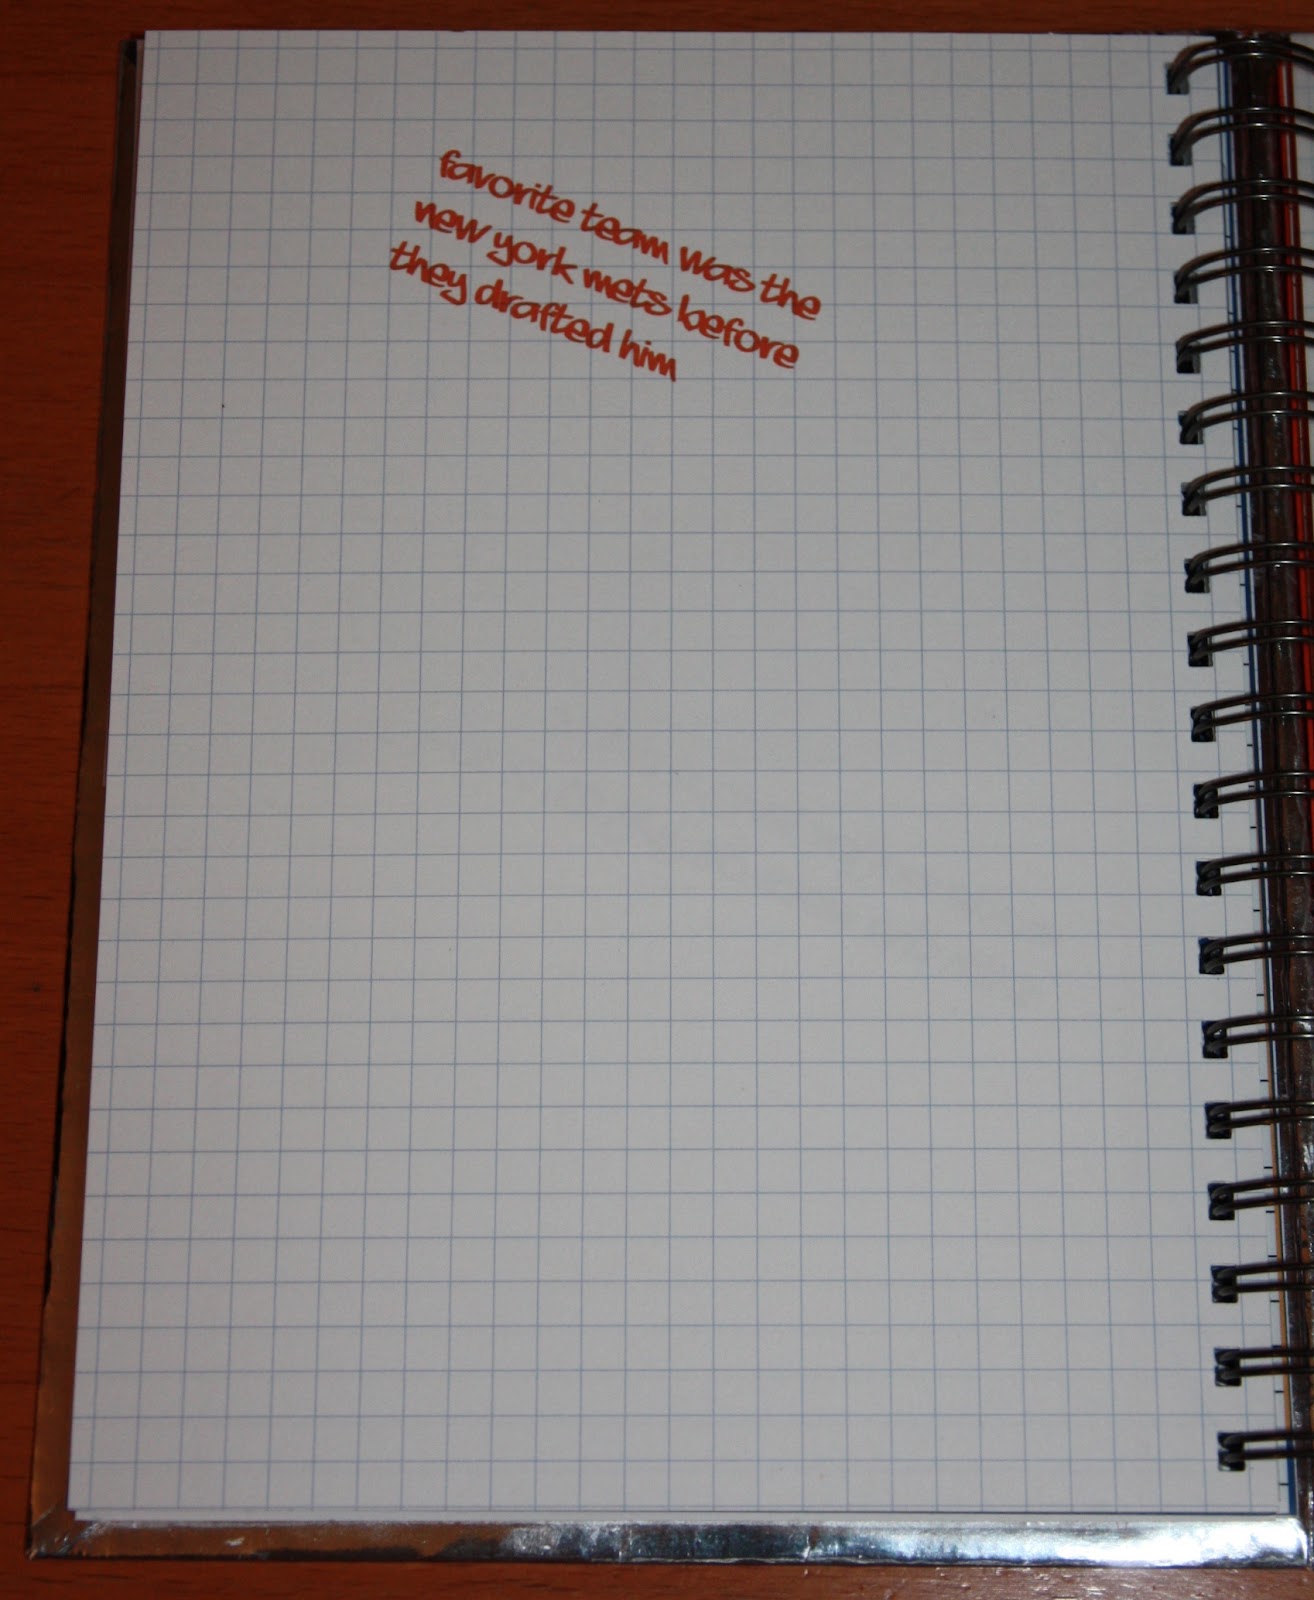
I found printable graph paper online, and on top of that I printed some David Wright facts. I also cut the baseball out from a Cuttlebug die cut and embossed it.

Close up of the baseball.
I inked the lines of the embossed baseball with red ink, and I made the baseball flip open so I could hide some facts underneath it.


Close up of page 5.
I created this in SCAL, welded it and cut it out on my Cricut. I used a white gel pen to embellish the letters.

Close up of the crown.
It's hard to see but this was cut out of gold metallic paper.

Pages 6 & 7...

Close up of page 6.
I designed this page after the sign you would see as you exited the #7 train at the Willets Point subway station when the Mets played at Shea Stadium. Now the sign says Mets Stadium. We have a lot of good memories of Shea Stadium so I wanted to throw this in there. I searched for a font that was similar to the font used in subway station signs, used SCAL and my Cricut.

Close up of page 7.
This page is a manila envelope. Inside the envelope is a piece of cardstock with 5 questions about David Wright. While searching the internet for things I could include in the book I came across a website called David Wright or Wrong. The website had a game you could play answering questions about him. I though it would be cute to include the questions and see how much my daughter really knew about him.

Pages 8 & 9...

close up of page 8.
This is the backside of the manila envelope with the flap open. I pulled the questions out a little bit just to take a photo.

close up of page 9.

I cut the baseball glove I used on this page using the Baseball Solutions cartridge and my Cricut. Again I made this so it would flip open and I could put a fact underneath. I inked the glove with Tim Holtz Distress Ink. Close up of the baseball glove.


Pages 10 & 11...

Close up of page 10.
I found printable lined paper online, and used the Cuttlebug baseball die cut again.

Close up of the baseball.


In between pages 10 & 11 I printed one of David Wright's Vitaminwater ads on vellum.

Close up of page 11.
On this page, again I printed lined paper on card stock, and printed a fact over that.

Pages 12, 13, 14, 15, 16 & 17

Close up of page 12.
This is another photo my daughter took at one of the games, and again I designed the paper on Excel and printed it on white cardstock.

I was trying to figure out a way to put baseball cards in this book. I search all over the internet and found these pages that hold 8 cards, 4 cards on one side, and 4 cards on the other side. They fit perfectly.
Page 13

Page 14

Page 15

Page 16

Close up of page 17
For the skyline I used the Plantin Schoolbook cartridge. I cut the skyline out with the image flipped and the shadow in orange cardstock and regular image in black cardstock.

Page 18 & 19

Close up of page 18
I found this online, and printed it out on white cardstock.

Close up of page 19.
Movin Wright Along starts the 2nd section.

Pages 20 & 21

Close up of page 20.
I think this is my favorite page in the book. This page is the Mets Home Run Apple. The Home Run Apple came out of a magic hat, that was in the outfield, after every Mets home run at Shea Stadium. For the apple, hat and wording I used SCAL and cut it out on my Cricut. The Mets symbol in the center is an official sticker.

I made the hat flip open so I could hide a Wright fact in it.

Close up of page 21.
Another photo taken by my daughter.

Pages 22 and 23

Close up of the baseball.


I between pages 22 and 23 is another David Wright Vitaminwater ad printed on vellum.

Close up of page 23 with another Wright fact.

Pages 24 & 25

Close up of page 24 with another fascinating fact.
In between page 24 & 25 is a small manila envelope that has the word rookie on it.

Close up of the manila envelope.

Inside the envelope is this fact.

Close up of page 25
I asked my daughter to write down words that she would use to describe David Wright. I used those words to create this Wordle page and I printed it on vellum.

Back of page 25 & page 26

Close up of page 26
I wanted to leave blank pages and spaces for my daughter to be able write things.

Pages 27, 28, 29, 30, 31 & 32

Close up of page 27
Another photograph taken by my daughter.

Page 28

Page 29

Page 30

Page 31

Close up of page 32
Again I used Plantin School Book for the skyline. I cut the skyline shadow in blue cardstock, and regular image in silver metallic cardstock.

Pages 33 & 34

Close up of page 33
I found this online, and printed it out on white cardstock.

Close up of page 34
Heading in the Wright Direction starts the 3rd and final section of the book.

Pages 35 & 36

Close up of page 35
I put a pocket on this page with the words Choose the Wright Path printed on vellum and I attached it to the pocket with my Xyron.

Close up of page 36
Another photo my daughter took.

Pages 37, 38, 39 & 40

Close up of the baseball on page 37


Close up of page 38
For this page I cut the number 5 on my Cricut using SCAL.
Close up of page 39
It's another David Wright Vitaminwater ad printed on vellum.

Close up of page 40 with another fact.

Pages 41 & 42

Close up of page 41

Close up of the glove


In between pages 41 & 42 is another David Wright Vitaminwater ad printed on vellum.

Close up of page 42
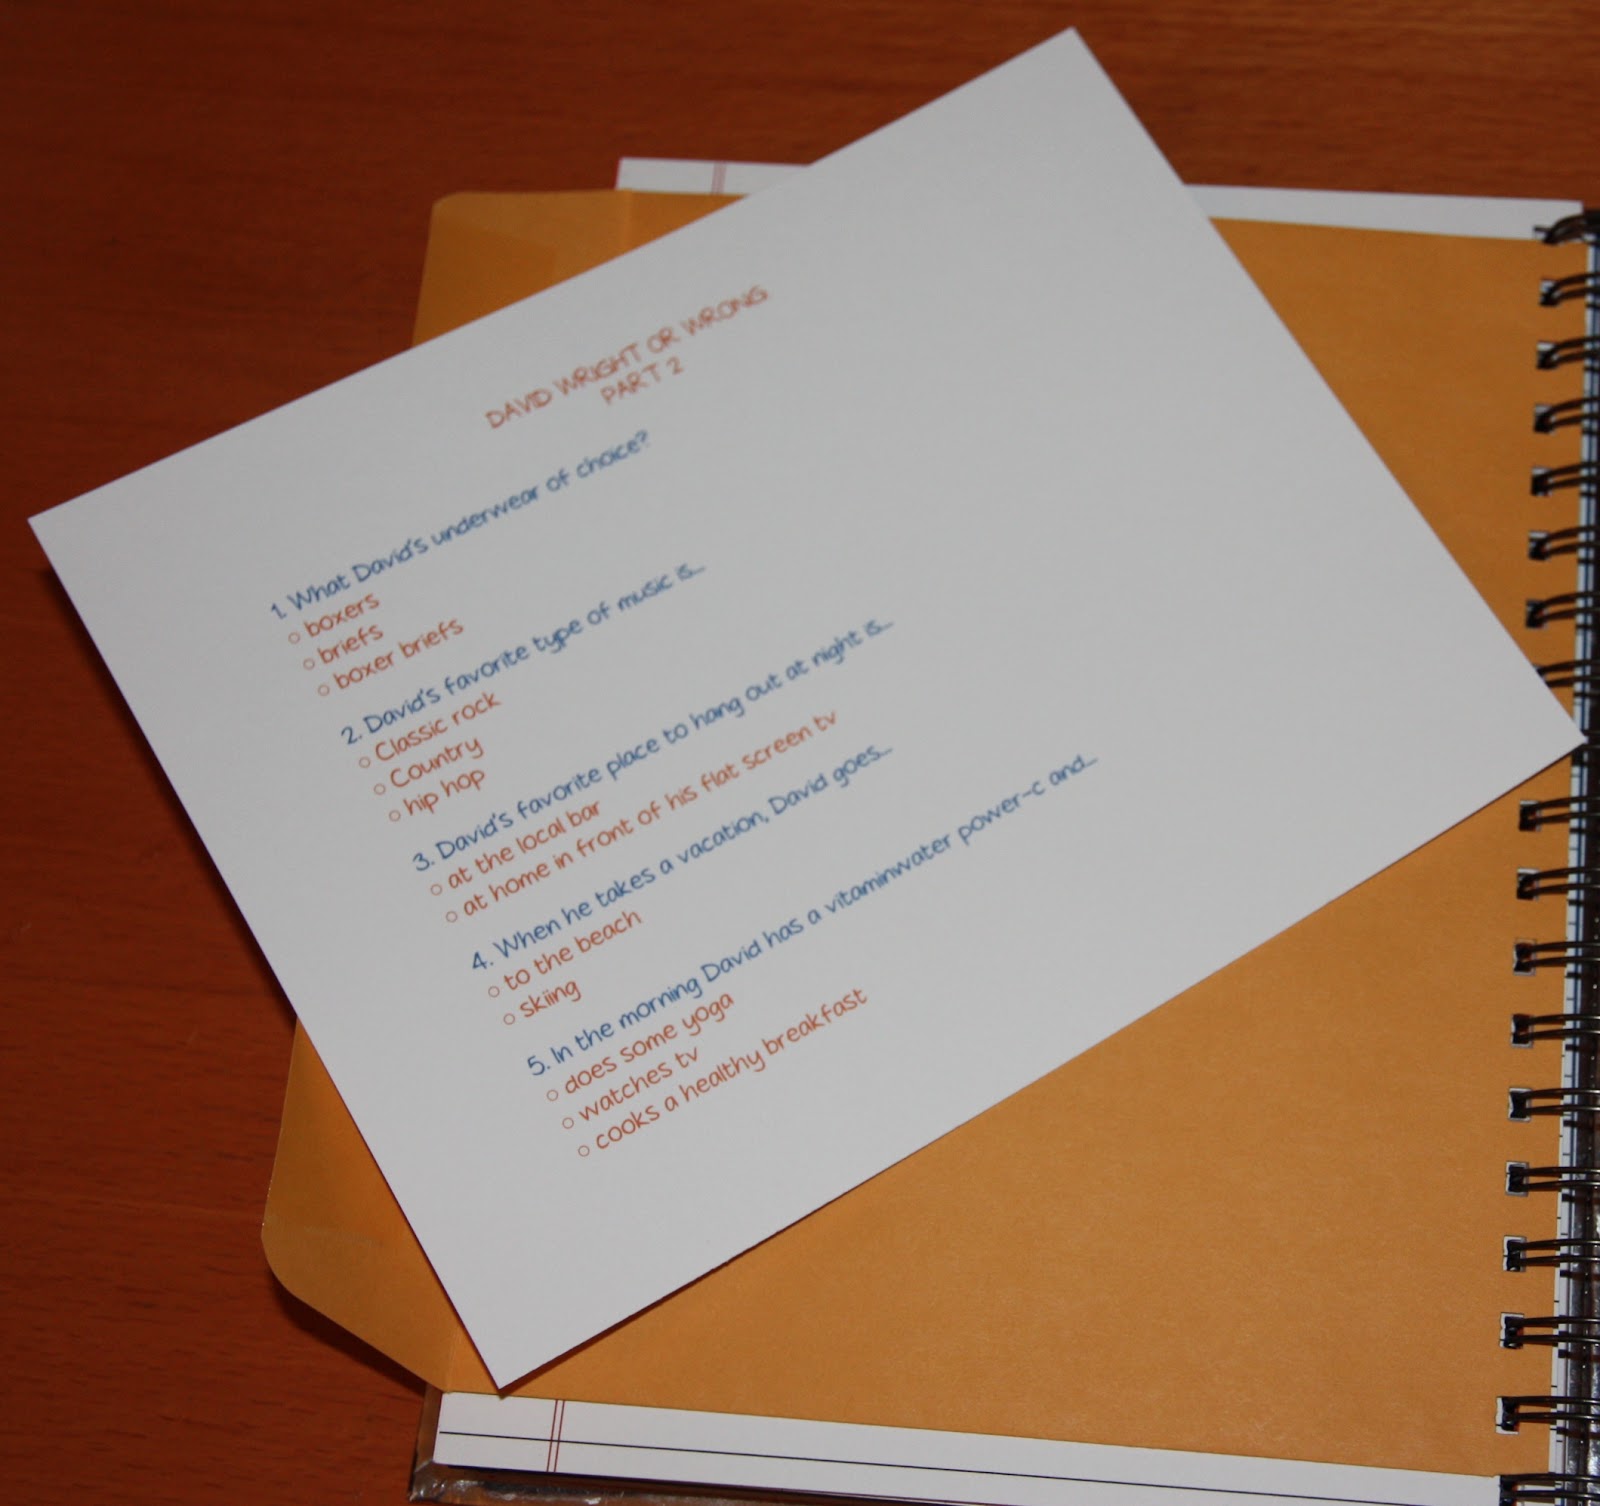
This in Part 2 of David Wright or Wrong. This manila envelope contains 5 more multiple choice questions about David Wright.

Pages 43 & 44

Close up of page 43
This is just the backside of the manila envelope with the flap open. I pulled the questions out of the envelope just to take a photo.
Close up of page 44 with another fact.

Close up of the baseball.


Pages 45, 46, 47, 48, 49 & 50

Close up of page 45
I have posted this pic before on my blog, but it's my daughters favorite picture so I had to include it.

Page 46

Page 47

Page 48

Page 49

Close up of page 50
Again I used Plantin School Book for the skyline. I cut the skyline shadow in black cardstock, and regular image in blue cardstock.

This is page 51, the last page and the back inside cover.

Close up of page 51.
I made a pocket on this page and printed the wording, Always do the WRIGHT thing on vellum which I attached to the pocket with my Xyron.

Close up of the inside back cover.
I bought this pen holder which has adhesive on it at the Container Store.

Close up of the back cover.

I punched and binded this book together with my Bind it All.